Top “You Can Play” – Ranked as a must play by Golf Digest, Golfweek & GolfWRX.
OUR COURSE
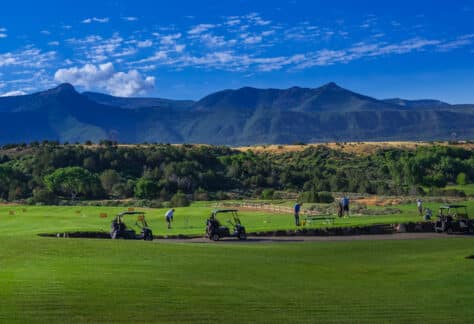
Take a hole-by-hole tour of Colorado’s Battlement Mesa Golf Club, where nature’s beauty meets nature’s challenge.
HOLE 1
HOLE 1
PRO TIP
One of the toughest starting holes around. Lay up short of the hill to 165 yards from the green and you’ll have the best look at the green. Big hitters can bomb it over the hill and have a short, uphill approach. Avoid the trap to the left of the fairway that is even with the landing area. There’s trouble left of the green.
 Par 4 Par 4 |
|||||
|
|
||||


HOLE 2
HOLE 2
PRO TIP
Be careful with the tee shot! The carry to cut the corner is farther than it looks. The ideal tee shot is just to the right of the tree on the corner. This will leave you a short to mid-iron approach to this amphitheater green.
| Par 4 |
|||||
|
|
||||
HOLE 3
HOLE 3
PRO TIP
Club selection on this par 3 is important. If the ball lands short of the green, it will generally not bounce up, so take plenty of club and fly your ball to the hole. Favor the right side as any misses there have the chance of bouncing down to the green.
| Par 3 |
|||||
|
|
||||
HOLE 4
HOLE 4
PRO TIP
A tee shot to the left of the tree in the fairway leaves you with a short iron to a deep, narrow green. Avoid missing this green long or to the right.
| Par 4 |
|||||
|
|
||||
HOLE 5
HOLE 5
PRO TIP
You should favor the left side of this fairway as it tilts left-to-right. This can be considered a reachable par 5, but there is some risk involved. The green is hidden around the corner to the left with a creek and trees on the left side. The prudent play is to lay up to 120 yards for your third shot. Be aware of pin position as this green has a large tier in it.
| Par 5 |
|||||
|
|
||||
HOLE 6
HOLE 6
PRO TIP
This hole is downhill and generally plays downwind, so don’t be too intimidated by the length. A tee shot just left of the fairway bunker will give you a good look at this expansive, undulating green.
| Par 4 |
|||||
|
|
||||
HOLE 7
HOLE 7
PRO TIP
Conservative play is the secret on this three shot par 5. Trying for the green in two is a bad choice as the approach is very narrow with the green being surrounded by bunkers and a small pond to the right. Lay up to about 125 yards for the best access to this green. Par is always a good score.
| Par 5 |
|||||
|
|
||||
HOLE 8
HOLE 8
PRO TIP
Playing at the pin on this short par 3 may not be the thing to do. The wind can be a huge factor coming off your right side over the pond, so shoot for the fat of the green. Avoid the bunkers behind the green, as your next shot will generally be back at the water.
| Par 3 |
|||||
|
|
||||
HOLE 9
HOLE 9
PRO TIP
A straight tee shot is a must as the sagebrush to the left and right tends to catch a lot of stray balls. The green is large and terraced, so be ware of pin position to get yourself in the right area!
| Par 4 |
|||||
|
|
||||
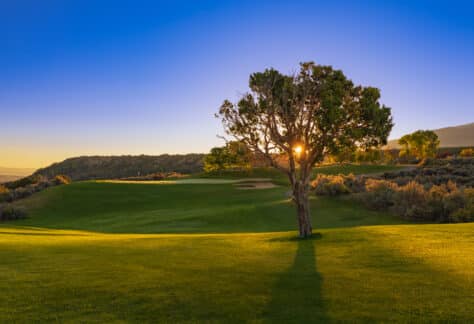
Put your game to the test against nature at its most pure.
ABOUT BATTLEMENT MESA
If you haven’t heard of Battlement Mesa Golf Club, we understand. Western Colorado isn’t exactly known for the all-inclusive frills that draw destination-course crowds. But what we have to offer in a golf-vacation…is golf. Golf architected by rushing waters dutifully carving apart plateaus for millennia. Golf that challenges by honoring what was here; elevations, approaches, and penalties predetermined by nature.
BATTLEMENT MESA – Golf the way nature intended.

OUR EVENTS

Grand Valley Athletics Tournament
Battlement Mesa Golf Course
3930 N Battlement Pkwy, Parachute, CO 81635
Callaway Demo Day
Battlement Mesa Golf Course
3930 N Battlement Pkwy, Parachute, CO 81635
Grand River Hospital Tournament
Battlement Mesa Golf Course
3930 N Battlement Pkwy, Parachute, CO 81635
Titleist & Cobra Demo Day
Battlement Mesa Golf Course
3930 N Battlement Pkwy, Parachute, CO 81635
BMGC Couples Tournament
Battlement Mesa Golf Course
3930 N Battlement Pkwy, Parachute, CO 81635

Battlement Mesa Open
Battlement Mesa Golf Course
3930 N Battlement Pkwy, Parachute, CO 81635

Junior Golf Clinic #1
Battlement Mesa Golf Course
3930 N Battlement Pkwy, Parachute, CO 81635

Gals and Greens Tournament
Battlement Mesa Golf Course
3930 N Battlement Pkwy, Parachute, CO 81635
Junior Golf Clinic #2
Battlement Mesa Golf Course
3930 N Battlement Pkwy, Parachute, CO 81635
Junior Golf Clinic #3
Battlement Mesa Golf Course
3930 N Battlement Pkwy, Parachute, CO 81635
Callaway Demo Day
Battlement Mesa Golf Course
3930 N Battlement Pkwy, Parachute, CO 81635